7 Ways To Increase Water Pressure in Tap & Shower At Home
The most common issue of Indian plumbing is less water pressure. Less water pressure at home can become really frustrating at the time of an emergency. Because of less water pressure, the buckets may take a lot of time to fill, pressure of shower spray may be less, the faucets may get less water pressure and many of such water problems may arise. Luckily there are solutions to increase water pressure with minimal efforts. So, in this article we are presenting 7 ways to increase water pressure in tap and shower at your home which will solve your problem.
Tip 1: Delivery line from the tank should be horizontal
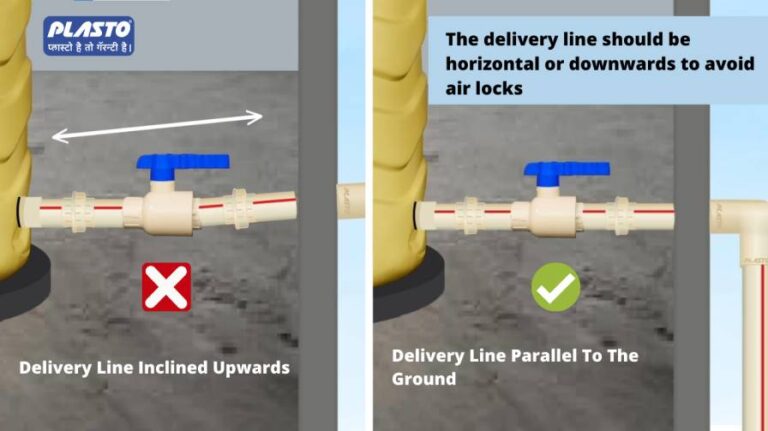
Delivery line from the tank should be horizontal or slightly downwards to the ground to avoid air traps: If the delivery line from the tank is slightly upwards then it will lead to air trap formation in the Plasto pipe as air is lighter in weight. Thus it travels in the upwards direction, causing it to create an air pocket at the end where the pipe is slightly upwards. Plumbers create air valves to get rid of the air pockets at high points in a pipeline. It is recommended to install the delivery line slightly downwards or horizontal to the ground. This will cause the air to travel back to the tank and hence automatically exit through the tank.
Tip 2: Use Plasto CPVC/UPVC pipes instead of GI pipes
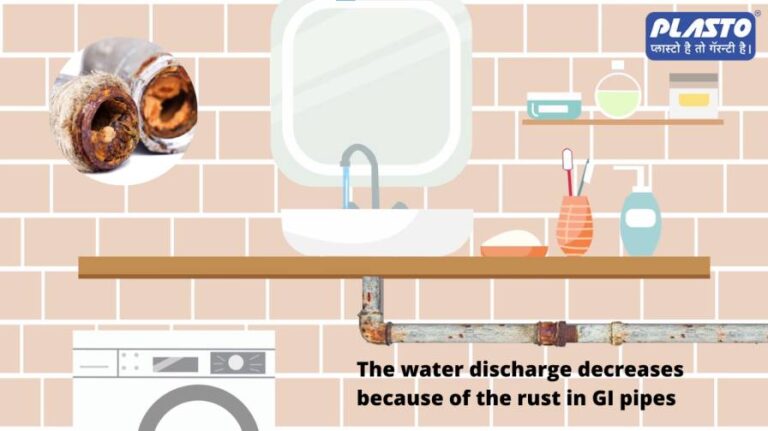
Use Plasto CPVC/UPVC pipes instead of GI pipes: GI pipes get rusted when they come in contact with the moisture. This rust can lead to less water pressure. There are various health related issues that are caused due to rust in the pipeline such as cholera and diarrhea. GI pipes degrade overtime and can ultimately break after certain years. Plasto CPVC/UPVC pipes have a life performance period of up to 50 years. PVC pipes can be used to transport drinkable water. You will not face an issue of pipe degradation when it comes to Plasto PVC pipes.
Tip 3: More the diameter of pipe, More the water pressure
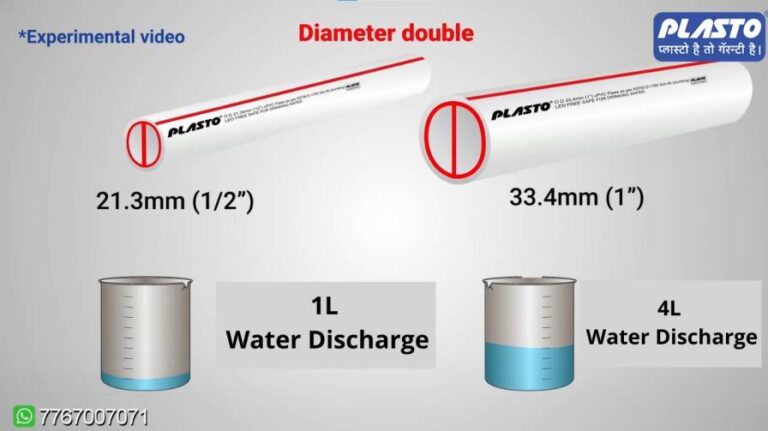
More the diameter of pipe, More the water pressure: In a 1/2’’ inch pipeline, let’s say we get 1 liter of water pressure and when we use 1’’ pipeline, this water pressure increases to 4 liter. This indicates when there is an increase in the size of the pipe, the water pressure also increases.
Tip 4: It is recommended to use Plasto 45 Degree shoe bend
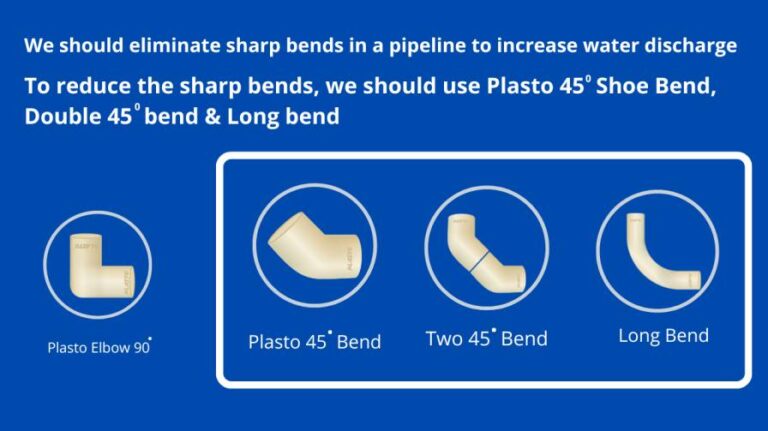
It is recommended to use Plasto 45 Degree shoe bend, Plasto Long bend & Plasto double 45* shoe bend for more water pressure instead of 90 Degree elbow.
So before discussing this point, let’s first understand what a bend is?
A bend in a pipeline is a fitting that is used to change the direction of the pipe in a certain direction. Plasto 90* elbow, Plasto 45* shoe bend, Plasto Long bend & Plasto double 45* shoe bend are the most common bends that are used in plumbing.
Now, there is a friction loss on every bend. This means on every bend, the flow of the water will reduce by a certain level. On a 90* Elbow, there is a water pressure loss of 3.7L/min. Let’s say you get 25L of water pressure in a small bucket. But when you 1 elbow, you’ll receive only 21.3L of water. Similarly on a double 45* shoe bend, you lose 2.3L/min, on a long bend you lose 2.17L/min & on one 45* shoe bend there is a pressure loss of 1.6L/min.
This indicates that Plasto 45* shoe bend acts as the best fit for any pipeline to get more water pressure as there is less pressure loss associated with it.
Tip 5: To increase the water pressure rate we should decrease the number of bends in a pipeline
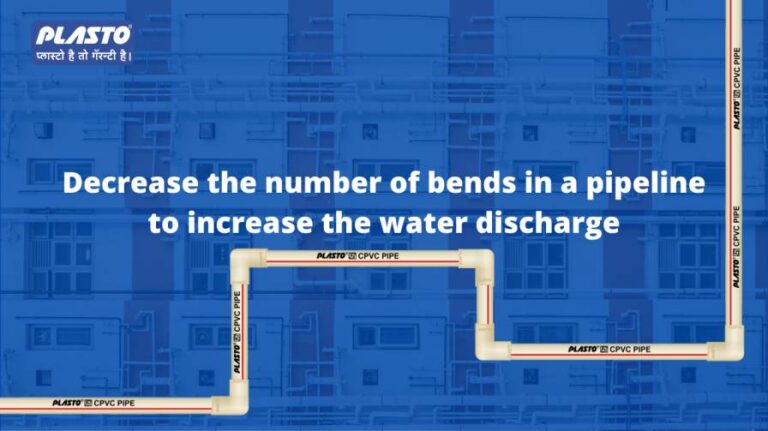
To increase the water pressure rate we should decrease the number of bends in a pipeline. If there is more number of bends in a pipeline the diameter of the pipe should be bigger.
Now that we know, there’s a pressure loss on every fitting. But what if there is a necessity to use more bends? In this case, it’s recommended to use a large diameter of pipe.
In a 1/2” pipeline, where no bend is used, we get a water pressure of 38.24L/min. And when we add 9 elbows in this pipeline, this pressure rate reduces to 16.36L/min which is 22% less.
Similarly, in a 1” pipeline, when no bend is used, we get a water pressure of 46.59L/min. And when we add 9 elbows in this pipeline, the pressure rate reduces to 29.85L/min which is 16% less.
And in a 3/4” pipeline, when no bend is used, we get a pressure rate of 52.2L/min. And when 9 elbows are added, this rate reduces to m 41.94L/min which is 10% less.
These figures indicate that when you need to increase the number of bends in a pipeline, you should increase the diameter of the pipeline more than the diameter of pipe.
Tip 6: It is preferred to use Plasto reducer after the Plasto Tee
It is preferred to use Plasto reducer after the Plasto Tee. Often people use a reducer before the Tee because of which the water pressure reduces before the water passes through tee. And then water pressure further decreases because of the friction loss and less pipe diameter. Using a reducer after the Tee doesn’t decrease the pressure rate and the water is first distributed and further reduced equally.
Remember: Use a reducer after the Tee only when you need to further change the diameter of the pipeline.
Tip 7: Looping a pipeline can help you increase the water pressure rate in the pipeline
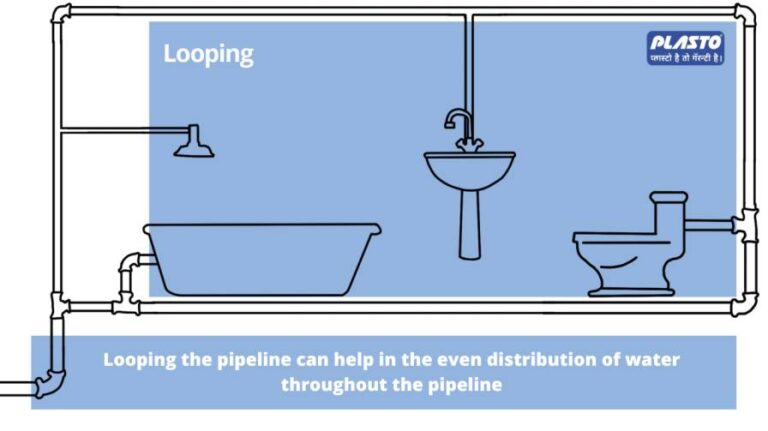
Looping a pipeline can help you increase the water pressure rate in the pipeline.
We carried out experiments in our Plasto factory and found out that looping a pipeline can help in increasing the water pressure rate.
For example you’ve a pipeline entering the bathroom of 3/4” that is further converted to 1”. This pipeline is first connected to the bathtub and shower then to the wash basin and lastly with the toilet seat. When all the 3 taps are started, all the water is consumed by the bathtub and shower and very less water is further transferred to the wash basin and toilet seat.
To solve this problem, we create a loop where the start of the main pipeline is further increased and connected back to form a loop just like shown in the diagram below.
So when there is water in the loop all the time and water is efficiently distributed through the pipeline.
Conclusion
These 7 tips will help you to increase the water pressure rate in your pipeline. Every experiment was conducted in the Plasto factory and figures were very closely noted. These tips act as the best practices that you can follow to increase the water pressure rate in tap and shower at your home.
Share This Post To Your Social Media
Read More Blogs
Beat the Heat: Why the 6-Layer Plasto Water Tank is Your Best Choice This Summer!!
Beat the Heat: Why the 6-Layer Plasto Water Tank is Your Best Choice This Summer!! Which Water Storage Tank is Best in Summers: As summer...
Read MoreWhat is a Bio Septic Tank AND advantages of bio septic tanks?
Home Blog What is a Bio Septic Tank AND advantages of bio septic tanks? In the quest for sustainable and environmentally friendly solutions, the Plasto...
Read MoreEfficiency Meets Innovation: A Deep Dive into Plastos Hose Pipe Connectors
In the realm of gardening and outdoor maintenance, every drop counts. Whether you’re nurturing a vibrant garden oasis or tending to the greenery surrounding your...
Read MoreUnveiling the Advantages of Submersible Plasto Column Pipes in Modern Applications
Home Blog Unveiling the Advantages of Submersible Plasto Column Pipes in Modern Applications Column pipes play a crucial role in the efficient functioning of submersible...
Read More